DIY Electric Vehicle Brake Pad Replacement at Home
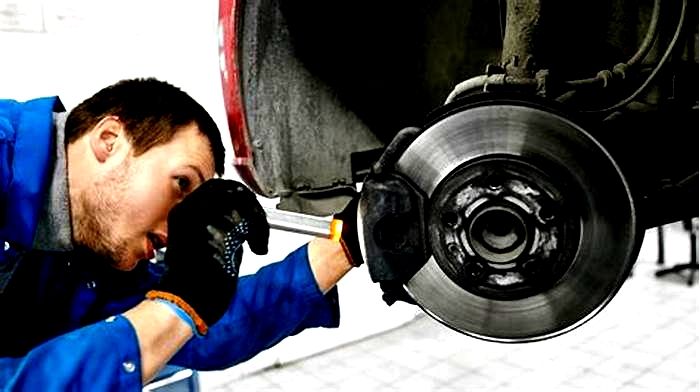
How To Replace Brake Pads At Home? A Complete Guide For Beginners
By Tsukasa Azuma
Last updated May 12, 2023
0 comments
Learning how to replace brake pads is essential knowledge that every driver should know. Day after day, your brake pads get worn steadily, so to ensure your car stops right after you press the pedal, you need to know when and how to replace your old ones by a new set of brake pads precisely. Having your pads replaced by an auto mechanic could be expensive. If you have a technically savvy mind, you may perform the brake pad replacement on your own. Below we discuss the steps involving brake pad replacement.
How To Replace Brake Pads At Home? A Complete Guide For Beginners
1. Materials and Tools
- A flashlight
- A container of brake fluid
- A sturdy car jack
- Some latex or nitrile gloves (optional)
- A few clean rags
- Some old newspaper
- A sturdy piece of wire (like a coat hanger)
- Your new brake pads
- A large C clamp
- A good set of tools
- A stand to support the car
2. Get Ready
Set the brake upon parking your vehicle on a level surface. Now take the chunks of wood and place them before and after one of the rear tires. Do the same for a front tire if you are going to replace the rear pads. This ensures that the vehicle doesnt move while replacing the pads.
Dont touch the pads right after you have driven your car; let them cool down to avoid accidents.
FURTHER READ:
3. Jack Up The Car And Loosen The Lugs
Loosen the lugs of your vehicle until they spin freely, and use the jack to raise the wheel, and make sure the tire doesnt come in touch with the ground. Be careful while using one of the frame contact points identified your owners manual, and lower down the car onto the stand.
Using any other places to lift the vehicle may substantially damage that section. Once you set the car on the stand, it should be supported in a stable manner. Also, there should remain enough space between the ground and the tire.
4. Remove The Wheel
Removing the wheel is the next step in How to replace brake pads procedure. Spin off the lugs carefully and pull it off of the car. It dismounts easily, set it aside. Put the vehicle in gear or re-check the parking brake if you find the wheels seem to be spinning when loosening the nuts.
5. Remove The Caliper
The first thing you notice when removing the wheel is the rotor or the disc. The shiny and circulars location is right behind the wheel. Instead of directly touching the caliper and the rotor, try feeling the back of the caliper first. There are two bolts, one for each end.
Use an appropriate wrench to loosen the bolts on the caliper. Remove the caliper from the disc. Once you have removed the caliper, use the wire to support it and make sure there is no pressure on the line.
When replacing pads on the rear wheels, check to make sure the parking brake is not set. If there is a bit of pressure on the parking brake, then it will not be possible to remove the caliper.
6. Remove And Replace The Pads
Check and find out the way the pads are mounted, and remove them. The piston looks like a cup lying on the inboard side of the caliper. Take the C clamp and use it to compress the piston back into the caliper. Following the manual, replace the pads.
7. Reassemble The Components
Putting everything back together is easier than what you think. Carefully tighten the caliper bolts. Do the same for each wheel.
This whole process comes handy in changing brake pads. Never try to change car brake pads when you find out that there is something wrong with the brake rotors; since its a symptom of a more severe brake issue. Also inspect the disc carefully to trace signs of excessive grooves.
Check out the video below to learn about how to replace brake pads at home in detail:
Frequently Asked Questions Related ToReplacing Brake Pads
1. How Does A Brake System Work?
The braking system of a car plays an important role in your driving experience. It works to keep you safe from everything on the street. For example, your brake system will help you stop when you are going to hit a school bus or anything else. The principle of brake system is easy to understand. It is a simple hydraulic system which enables the force applied at the pedal to be transformed to clamping force at the wheel. What the video below to know how the brake system works in detail:
2. How Much Does It Cost To Change My Brakes?
If you are driving a typical vehicle regularly, the fee to change your brakes is from $50 to $80 (for 4 sets of pads); and from $150 to $200 for a set of rotors and pads, both front and rear. The time a mechanic needs to replace the brake system is from 1 to 2 hours. Hence, by replacing the brake system yourself, you will save around $170.
3. How Do I Know If I Need To Change My Brakes?
A worn down brake pad shows some main symptoms such as: making weird or squeaking noise when applied. Modern cars have brake pad wear sensors so they will alert the driver on the dash when the pads need to be replaced. Additionally, a worn brake pad requires a longer stroke to clamp down on the rotor than normal brake pad. So if you detect any symptoms about in your car, it will be time to change your brake system and take an overall maintenance for your car if necessary.
Owners of other Mazda vehicles such as the CX-3, CX-30, CX-7, CX-9, Mazda3, Mazda6, MX-30, MX-5 Miata, Mazda2, CX-4, CX-8 and BT-50 may also find these DIY instructions to be helpful.
A few compatible replacement sets of new rear brake pads with their part numbers are as follows: Power Stop 16-1846, ACDelco 17D1846CH,Raybestos EHT1846H and KFE KFE1846-104.
The tools and other items needed to complete this procedure include a lug nut wrench, a floor jack, two jack stands, wheel chocks, a 14mm socket with a 3/8" drive ratchet, an "F" clamp and a tube of brake caliper grease.
The first few steps are to drive your SUV on to a level surface, shift the transmission into "P" (Park) and turn off the ignition.
Place wheel chocks on both sides of the front tires to help prevent the vehicle from moving.
Attention: If your CX-5 is equipped with the "EPB" (electric or "electronic" parking brake) system, it must be placed into "service" or "maintenance" mode before you can continue with the pad replacement.
![]() Please proceed with caution and at your own risk!
Please proceed with caution and at your own risk!![]()
Release the electric parking brake by pushing down on the brake pedal and then push down on the EPB switch located at the rear left (driver) side corner of the gear selector assembly.
When the parking brake is released, you will hear the two rear EPB actuator motors make some noise for about a second or two. You will also see the red "(!) BRAKE" symbol on the speedometer turn off.
On some vehicles, I'm able to use myFoxwell NT680OBD2 scanner (also known as an "OBDII scan tool") to easily place the electric parking brake system into service mode.
Luckily, Mazda has provided an easy DIY method for owners to place the EPB system into service mode with just a few steps.
Complete the following steps to place the EPB system into service or "maintenance" mode to fully retract (wind back) the parking brake actuator motors so that the rear caliper pistons can be easily compressed to make room for the thicker new brake pads.Make sure the front wheels are blocked on both sides and the transmission is in "Park" to prevent the car from moving unexpectedly!
![]() Please proceed with caution and at your own risk!
Please proceed with caution and at your own risk!![]()
1. Switch the ignition to "ON" but doNOTstart the engine. (Keep your foot off the brake pedal.) You will need to press the "START" button a total of two times. Once to turn on "accessory power" and then again to turn the ignition system on.
2. If you haven't already done so, release the parking brake by placing your foot on the brake pedal and then pushing down on the EPB switch near the gear selector.
3. Release the brake pedal.
4. Press the accelerator (gas) pedal all the way down and at the same time push down the EPB switch and hold them both in that position. Continue to hold down the gas pedal and press down the EPB switch during the next step.
5. With your free hand, press the "START" button three times rapidly in a row.
6. Turn the ignition to "OFF".
If you completed the procedure correctly, you will hear the EPB actuator motors make noise while they wind all the way back away from the piston for about a few seconds.
You will also see the yellow "(P!)" symbol with on the tachometer (RPM gauge) as shown inPicture # 2in the row of pictures above.
Note - I will detail the procedure for ending / exiting maintenance mode at the end of this guide.
Alternative EPB Maintenance Mode Instructions In CX-5 Service Manual
The shop manual for the 2016, 2017, 2018 and 2019 Mazda CX-5 has slightly different instructions for placing the electric parking brake system into maintenance mode. I'm including those directions just in case the above steps do not work for your CX-5. Be sure to place wheel chocks on both sides of the front tires and keep the transmission in "Park" to prevent the vehicle from moving.
1. Switch the ignition ON (engine off).
2. Release the electric parking brake.
3. Switch the ignition to OFF and then switch the ignition to ON within 5 seconds while maintaining the following conditions:
Press down the EPB switch and fully depress the accelerator pedal at the same time.
4. Verify that the (P!) warning light is illuminated in an amber color and the mode is switched to maintenance mode.
5. Switch the ignition to OFF.
I will provide the instructions from the 2016-2019 CX-5 service manual for exiting / ending maintenance mode at the end of the guide.
DIY: Rear Brake Pad Change 2015-2019 Subaru Outback
So my rear brake pads lasted about 60-65k miles before needing replacement.
I went and got new pads but realized that they were a bit different than other brakes I've changed before on account of the electric parking brake.
Still pretty easy. I went and got a brake caliper tool and made quick work of it.
Guide:
Jack the car up. Support with jack stands. Take the wheel off. Retract the parking brake if it's set.
Remove the clip (I just used a flat head screwdriver) and the caliper bracket with 2 14mm bolts.
Caliper/bracket slides off. Hang it to prevent the brake hose from stretching and causing problems.
Match the brake tool with the grooves in the parking brake (if you don't have a tool I've used needle nose pliers on another vehicle but it's way more frustrating) and tighten the parking brake down.
Then just push the caliper in the rest of the way with the flat disc on the brake tool (channel locks or a C clamp can work too) to make room for the new pads.
From there grease the sliding surfaces of the pads and install them in the bracket.
Done. Reinstall. Torque wheel to 88.5 lb ft.
The brake tool I used is
here.And the pads I got were
Powerstop Z23-1808although you could use any brand you'd like so long as they're correct for the vehicle.

